Crochet blankets for children. Crocheted baby blankets. To crochet a baby blanket you will need. DIY knitted blankets. Description. Studying the beautiful “Houndstooth” pattern
/ 01/19/2017 at 23:53
Greetings, dear friends. Do you know what is the most difficult thing when creating a new knitted item? This is to start it. And this difficulty arises not only from the fact that you need to come up with, choose a pattern, calculate loops, etc., but also because of the enormous possibilities of choice that this wonderful type of needlework presents to us.
It seems like I’ve already come up with an idea, started knitting, knitted it, and then you think – but if I did that, it would be better, and with this pattern it’s even better, and I want to do it this way and that way... It turns out that imagination, thoughts, ideas fly forward, but I don’t have enough time and hands... Does this happen to you too?
It can also be difficult because, having figured out how to knit a new thing, you can’t always imagine exactly what it will look like when finished. I expected one thing, but got something else...
So I thought that if it becomes possible to view in one place what a wide variety of products can look like in finished form, then perhaps this will at least a little simplify the task of choosing (thinking, doubting) before starting knitting for those who suddenly want to knit knitted children's blanket.
That is, the purpose of this article is simply to provide an overview and give ideas. You can look at ready-made options already associated with someone and choose what suits you best. Or change/improve existing options at your discretion.
For ease of viewing, I divided the “family” of children’s blankets into groups.
Here you can come up with options from the simplest blankets, knitted with regular garter stitch or checkerboard stitch, to more complex patterns. Schemes of some patterns can be found in this blog: for blanket 1 in the photo - description (note that this pattern is also double-sided), for blanket 2 - see the diagram, and I also want to draw your attention to simple blanket 3. It is knitted in garter stitch diagonal with a wide separating edge. A detailed description of how this is done can be found in this article. These options may work well for beginners.
By combining only knit and purl stitches, you can knit not only patterns, but also various pictures on children's themes. Here you will find bear cubs, and bunnies, and hearts, and stars, and so on. Many such ready-made patterns can be found on the Internet, or you can even take simple cross-stitch patterns and translate them into the “language” of knitting, replacing contrasting colors with knit/purl stitches.


And if you wish, you can make a 2 in 1 blanket, with a toy, “introducing” some other animal into it, so that the child will be warm and amused at the same time:

Blankets knitted with openwork patterns
This is one of the most common types of knitting children's blankets, in my opinion. In any case, many people knit openwork blankets for children, it’s hard to say why. There are a great variety of openwork patterns - from simple to very complex, and it is impossible to even imagine the diversity of such blankets.


The openwork looks beautiful in combination with braids and offset loops:

Or you can knit patterns not in a straight line, but from the center, as in these samples:


Plaids using braids and plaits
In my opinion, using various braids and strands to knit blankets is always a win-win option. Moreover, such blankets are suitable not only for children, but also for general use, and will wonderfully decorate and diversify the interior:


But you can also knit a blanket with braids not with a solid fabric, but from strips, and then connect them in different directions:

Multi-colored and combined blankets
And here there is room for your imagination to run wild! Here you can combine different colors and different patterns with each other as your heart desires:


You can knit in parts: either in squares or stripes. And the drawings to choose are also very diverse:


Animals knitted using the intarsia technique will look fun - be it whales or little hares:

Or at least elephants with false ears:

And there is a place for sheep:

And these sheep look even more interesting if you knit them with yarn, like grass:

And if you really work hard, you can create such a masterpiece (instead of birds, you can use beautiful drawings of butterflies, flowers, etc.):

Blankets knitted with wavy or zigzag patterns will always look beautiful, gentle, and fun:


Experienced knitters are able to create real masterpieces using a hook and yarn, but even for beginners it will not be difficult to crochet a plush blanket. Despite the fact that this product is quite large in size, the process of its manufacture is very simple and interesting. Armed with patterns and all the necessary materials, you can safely start knitting, as a result of which you will be able to create your own masterpiece.
Experienced knitters are able to create real masterpieces using a hook and yarn
Detailed descriptions and simple patterns will help even beginners cope with knitting. A blanket knitted in squares of different sizes will exceed all expectations and become not only a salvation on cold evenings, but also an original decoration.
What is necessary:
- 6 skeins of yarn of different colors;
- hook No. 4.5.
We knit according to the pattern:
- Cast on 8 loops and close them into a ring by connecting the first and last of them.
- Tie the resulting ring with single crochets and connect the first loop to the last.
- Start the second row with three chain stitches, then make a couple of single crochet stitches, a couple of chain stitches, three single crochet stitches, two chain stitches. Repeat the last two steps twice more.
- Before connecting the initial loop to the last, attach yarn of a different color.
- Start the next row with three chain stitches and two double crochets in the columns of the previous row, make a couple of chain stitches and four chain stitches.
- After this, knit a couple of double crochets in chain stitches and three in the columns of the bottom line, continue according to the pattern until the end of the row.
- Complete the next row in the same way as the previous one, increasing only the number of columns in the corners.
- Tie the finished square with single crochet columns.
- Using the same principle, increasing the number of rows and columns in the corners, knit the required number of squares.
- All parts are well ironed and sewn into a single whole.
At the final stage, it is necessary to tie the finished product with single crochet columns.
Crochet blanket (video)
How to knit a cute baby blanket: instructions for beginners
A baby blanket with funny bears will definitely please your baby. This blanket is suitable for both girls and boys. Despite the huge number of motifs used in the knitting process, creating an amazing product measuring 115 x 115 cm will be simple and exciting.
What is necessary:
- yarn of different colors;
- hook No. 3;
- satin ribbon.

A baby blanket with funny bears will definitely please your baby.
Progress:
- Knit nine motifs that will be located in the center (four with a circular pattern and five with a teddy bear pattern).
- Alternate colors and create small motifs.
- Knit 64 motifs in small size.
- Connect all the parts together and crochet the product around the perimeter.
- Sew a ribbon along the edge.
First motive:
- Cast on 24 stitches and knit the base row in single crochets.
- Make an additional loop and additionally work a single crochet into the first stitch of the previous row.
- Make a double crochet in the second stitch.
- Knit the entire row by alternating columns with and without double crochet.
- On the next line, knit an air loop again and knit the entire row in single crochet columns.
- Repeat these two rows until the very end.
Second motive:
- Cast on 31 stitches.
- In the eighth loop, knit a double crochet and cast on a couple of chain loops, then make another double crochet, forming an arch.
- Cast on three stitches, skip four warp loops and knit the arch again.
- Using this principle, continue knitting until there are only three loops left in the row.
- Cast on a couple of stitches and double crochet into the very last stitch.
- Start the second line with three chain stitches and on two of them make five single crochets, forming something like a shell.
- Knit the entire row in this manner.
- Start the third line with five lifting stitches, making an arch in the center shell stitch. Finish the entire row according to this pattern.
- Start the row with three chain stitches, knit a shell and repeat this pattern until the entire line is completed.
- Repeat the pattern of the second and third rows until the work is completed.
Third motive:
- Cast on just four stitches and close them into a circle.
- In the first line, make five chain stitches, then knit three double crochets in the center of the ring and additionally cast on a couple of loops. Repeat these steps twice.
- Knit a couple more columns in a circle and connect the column with the third stitch. Repeat the steps again.
- In the next row, knit a half-column of six chain stitches into an arch, and knit three more half-columns into the same arch.
- Skip three stitches, knit three half-columns and cast on a couple of loops.
- In the next arch, use a couple of additional loops to knit three half-columns.
- Repeat the pattern a couple more times, then pick up an additional stitch, skip three columns and knit a couple of half-columns in the same arch that was knitted at the very beginning of this line.
- Close the row and continue knitting according to this pattern, alternating the colors of the yarn.
Fourth motive:
- Make a chain of 26 stitches, then, starting from the fourth of them, knit double crochets.
- Additionally, cast on three stitches and knit a line similar to the previous one.
- Thus fulfill the entire motive.
Fifth motive:
- Cast on 33 stitches and work the base line with double crochets.
- Start the next line with three additional loops, knit one column on the back wall, and the other on the front.
- Carry out the pattern according to the given pattern.
Sixth motive:
- Start by casting on 24 stitches.
- Knit a couple of lines with double crochets.
- Only on the third line make three air stitches, and then follow this pattern to the end: three double crochets and pulling the thread from the wrong side.
- From the fourth to the eighth line, knit by casting on three additional stitches, and double crochets.
- Knit the ninth row in the same way as the third, and all the rest according to the pattern of the fourth.
Seventh motive:
- Make a chain of 26 loops and knit all the base loops with stitches.
- Add three air stitches and knit with regular stitches to the end of the line.
- Continue knitting according to this pattern, alternating thread colors.
Important! The height of each part should be 11 cm.
Crochet blanket for a newborn for discharge: master class
An openwork blanket is ideal for a newly born baby. After discharge from the maternity hospital, such a product can be placed in the stroller during evening walks, or covered with a light blanket for the baby in the crib. For children, such a blanket will be simply irreplaceable.
What is necessary:
- 300 g white yarn;
- hook No. 3.5.

An openwork blanket is ideal for a newly born baby
Progress:
- Guided by the diagram, knit 25 identical parts.
- During the knitting process, connect all the elements to each other.
- The finished product must be tied along the edge in three rows in the following order: five columns in one warp stitch, a pair of chain stitches and skipping two stitches, one column and a pair of chain stitches, skipping two stitches again. The bedspread is ready.
How to knit a blanket
Crocheted blankets and blankets look perfect, original and are very warm. If desired, they can be additionally decorated with patterns of small flowers and even large flowers. A small volumetric ornament and a flower meadow look incredibly beautiful. But even without such details, the product looks amazing.
What is necessary:
- 800 g yarn;
- hook number 10.

Crochet blankets and blankets look perfect
Progress:
- Make a chain of 122 stitches.
- Knit one line with single crochets
- In the next row, make all the columns with double crochets, knitting three chain stitches in each column of the previous row.
- Do the next row in the same way.
- Alternate the scheme of the second and third lines until the work is completed.
The very last of all rows must be knitted in single crochets.
Choosing yarn for a blanket
The size and density of the future product depends on the yarn. Soft threads of medium weight are ideal. Even beginner knitters will find it easy to knit with them.
When choosing, you should also consider the following nuances:
- for a small children's blanket, only three skeins of yarn are enough, and for a larger product you need to purchase at least six;
- It is advisable to take threads “in reserve”, since calculating the required amount is difficult even for experienced needlewomen;
- When purchasing, you need to carefully consider the article numbers on all skeins. If they are different, then the color of the yarn will be slightly different.
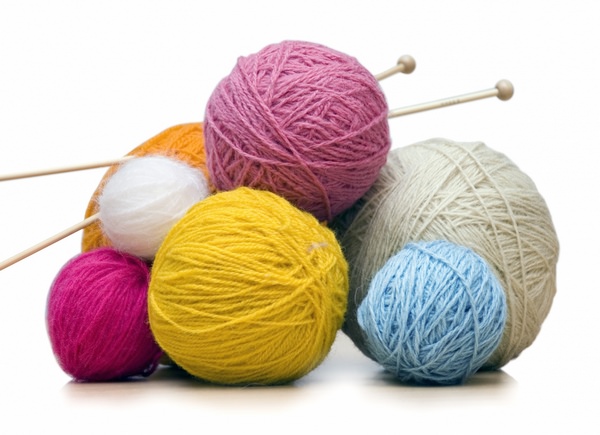
The size and density of the future product depends on the yarn.
What size should the blanket be?
Before you begin the process of making a blanket or blanket, you need to decide on its size. It will depend directly on who it is intended for and for what purpose it will be used. The main types of products should be like this.
The baby, especially in the first months of life, needs to be provided with a warm and favorable environment. For this reason, many mothers from the very first days try to wrap their child in warm blankets, diapers, and blankets.
But it is not at all necessary to cover the child with several blankets or diapers at once; you can simply crochet a blanket. It will turn out very warm and bright. If you have never done this activity, but really want to learn, then you should definitely consider knitting patterns for children's things, including a blanket.
How to crochet a simple blanket for a newborn baby's discharge
If you are planning a newborn in the near future, then you should think about a newborn discharge kit. In addition to standard diapers, vests, caps, rompers, and an envelope, it is worth preparing a blanket. For discharge, you can crochet a rather beautiful, elegant and very warm blanket.
For knitting you will need the following materials:
- 2 skeins of 100 grams of blue yarn with Marifefly Alize pompons;
- 100 grams of white yarn;
- hook – 3.5 cm.

Instructions for beginners:
- To begin with, a chain is made; it should be made of air loops. In total, about 145 VP will be required. This value is average, it all depends on the structure of the yarn;
- To accurately determine the number of loops, you can knit a small 12x12 sample. Using it you can calculate the required number of loops;
- We knit the first row. One stitch is double crochet from the hook into the third loop;
- Then you should knit one double crochet to the end of the row through each loop;
- After this, you need to knit the second and subsequent rows - make 2 VPs to lift the row. After this, you need to knit stitches again to the end of the double crochet row;
- If desired, the canvas can be made with stripes of different colors. Stripes can be made narrow or wide;
- The color of the yarn must be changed every 2-7 rows;
- During alternation, the thread is pulled along the edge of the fabric. Due to this, the edge is obtained with a rigid structure;
- At the end, you should tie the edges. For tying, you need to use a series of single crochets;
- After this, we move back and walk at a crawling pace.
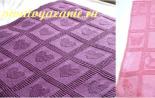
Blankets crocheted for a newborn baby from motifs
"Granny Square"
Let's prepare the necessary materials:
- for a fabric with parameters 110 cm x 130 cm you will need about 1800 grams of thread with different colors, but with the same thickness and fiber structure;
- crochet hook – 3.5-4 cm;
- needle.
Schemes and detailed description:
- We are preparing a pattern with which the fabric of the motifs will be knitted. It is better to use simple knitting;

- First we do the VP, in total you will need to do 4 VPs;

- Next you need to perform two double crochets + two VP. This knitting pattern needs to be done 4 times. At the end, it is necessary to connect the last loop with the first column in accordance with the diagram;

- The other next row is knitted from 5 double crochets + two double crochets through the VP of the first row + two VPs + 2 double crochets through the second VP + 2 double crochets. Knitting according to the proposed pattern must be done four times;

- After this, you need to perform 7 double crochets + 2 double crochets in the VP of the second row + two VPs + two double crochets in the second VP + four double crochets. Knitting according to this pattern must be done four times;

- A simple needle is used to join the knitting;

- The result should be a finished square:

- The remaining squares need to be connected in the same way. For a canvas with parameters 110 cm x 130 cm you will need 221 squares;
- After this, all the squares are connected to each other. In the pictures below you can see the connection method:

- The result is a large blanket of motifs;

- You can knit the fabric using the second version of the scheme.

How to make woven fabric from motifs
What you will need:
- one and a half kilograms of yarn with different colors;
- hooks 3 cm, 6.5-7 cm;
- needle.
Let's start knitting:

Instructions for crocheting an openwork blanket for a newborn
What materials will be needed:
- 500 grams of cotton yarn;
- crochet hook – 2 cm;
- thin ribbon of satin fabric - 6 meters.
Knitting patterns:


Let's start knitting:

- You can knit with a small hook No. 3 – 4.5 cm;
- If you have never crocheted before, be sure to learn how to do it first. You can knit a small square as a sample for testing;
- do not rely on memory, always use diagrams. Using patterns, you can make a beautiful canvas that will serve you for a long time;
- You can knit with yarn of different colors. For decoration, you can make inserts in the form of stripes with different colors;
- It is advisable to make a blanket for growth with parameters of 110 cm x 130 cm. It may be large for a newborn, but the canvas can be folded in half. But in the future it will become just the size of the baby;
- if you use yarn of different colors for knitting, then the thread should be the same in structure and thickness;
- if you are knitting a blanket for a girl, it is better to use gentle colors - pink, red, lilac, yellow. If it is for a boy, then cool colors are suitable - light blue, dark blue. Green, beige, and orange will be universal colors.

The process of crocheting a blanket for a newborn baby is a rather difficult process, but the result is worth all the effort invested. The main thing is to do everything according to the diagram and description. A handmade blanket turns out to be very beautiful, soft, and warm.
It will become an indispensable item for discharging a child from the maternity hospital; it can also be used instead of a blanket and as a blanket for a stroller when walking with the baby.
In the next video - another option for crocheting a blanket for a newborn.
Every child always wants to bury himself in a soft blanket on quiet evenings so that nothing can disturb him. But you must agree that a blanket knitted by your mother with love and warmth will be much better than a blanket bought in a store, especially since it will be much more expensive. Below is a step-by-step master class on a crocheted children's warm blanket, and a diagram and description will help you quickly master the technique.
Beginner craftswoman and don’t know how to knit? No problem! In today's material you will learn how to easily make different types of blankets; patterns for children's cozy blankets will help you master the crochet technique much faster.
Crocheted striped children's blanket according to patterns and descriptions
Blanket size: 80 by 97 cm.
For the blanket you will need: polyacrylic yarn SMS Bravo Baby blue (2 skeins of 50 g (184 m) and white (2 skeins of 50 g (184 m), hook No. 3. For a girl, blue yarn can be replaced, for example, with pink .
Sequence of alternating colors: * 3 rows blue, 1 row white, 1 row blue, 3 rows white, 1 row blue, 1 row white, then repeat from *.
The main pattern is knitted according to the pattern. Row 1 is repeated.
Description of how a crocheted blanket works: with blue thread you need to make a chain of 187 chain stitches + 3 chain stitches, then knit the main pattern in the specified sequence according to the pattern.

This is how a single crochet stitch is knitted (1 tbsp. s/n).

After 97 cm = 103 rows from the cast-on edge, the work can be completed.
Source: “Lena Creative” magazine No. 2 2016.
The best of the best product options
Blue baby blanket
To knit this blanket you will need 4 skeins of cotton or acrylic threads (382m/100g) and a hook No. 3.5 (4).
Blanket dimensions: 92*92 cm.
You need to cast on a chain of 206 chain stitches. In the second air loop you need to knit a single crochet and continue according to the pattern until the length of the blanket reaches 86-87 cm. The tying is done with double crochets.
Scheme:

"Like a cloud"
It is better to take white yarn "Naco Bambino" acrylic/wool - 75/25 (skein - 130m 50g), hook number 2. Consumption for a blanket measuring approximately 1m by 1m: 1,250 kg.

Scheme:

"Angel wings"
Knitted from soft silky yarn “Maigik” with a 3.5 crochet hook.


Blanket knitting patterns:


Thumbelina blanket
Jeans yarn from YarnArt (55% cotton, 45% polyacrylic, 50 g/160 m), pale pink color. A blanket measuring 90*90 cm takes 9 skeins. Hook 1.75.

Scheme:

"Tenderer than tender"
Alize Diva yarn (100% acrylic microfiber, 100 g/350 m) – light silky yarn, pleasant to the touch, hygroscopic, white color, 6 skeins. Hook 1.75 Clover. The size of the finished blanket is 90*90 cm.

Scheme:

Video on crocheting baby blankets:
Working with motifs in crocheting a baby blanket
A warm children's soft blanket, knitted from motifs, will be the most tender and pleasant gift for a baby.

It will take a couple of evenings to make a children's blanket from motifs. Despite its size, approximately 1 m * 1 m, this blanket of motifs is knitted quickly and easily. This work will be suitable for both experienced knitters and beginners in knitting. Below is a step-by-step master class “Crochet baby blanket”, a diagram and description will help you quickly master the technique.
The material that will be needed in the master class on creating a children's blanket, namely a pattern of motifs: yarn (you can use leftovers) - acrylic, half-wool, wool. In 100 g no more than 240 m; hook - 4.5, scissors, needle, thread for connecting motifs.

Abbreviations:
- Вп – air loop;
- Sc – single crochet;
- С1н – double crochet.
When crocheting a baby blanket, you need to knit loosely, as the edges and tops of the blanket may end up skewed. The blanket consists of two parts. The first is the inner part of the motifs (4 square motifs), the second part is the crocheting of the motifs. Each of the four motifs is knitted according to pattern 1.

A square motif is knitted. You need to put a chain of 5 chains on your hook.

The chain is closed with a half-column and 2 ch are knitted.

You need to yarn over the hook and knit 1h into the ring of the chain. 2 such columns are knitted.


Another 3 stitches are knitted.

Work 3 ch again. This will be the second vertex of the square element.

Then another 3 dc and 3 ch for the third top of the square.

In this first row of dc you need to knit a total of 12 dc. So, let's knit the last 3 dc and 3 ch.

A half-column closes the beginning and end of the row.

To switch to knitting the second row in a square motif, you need to make 4 ch.

Under the chain of 3 ch of the previous row we knit 3 dc.


We knit 1 ch and in the next chain of 3 ch of the previous row we knit 3 s1n.

3 ch and another 3 dc are collected under the second chain of ch.

Using the same principle that two vertices were knitted, the third vertex of the square element is also knitted.

The fourth top should be connected like this: 3 s1n, 3 ch, 2 s1n. In this case, the third column with 1n will be the air loops at the beginning of the row.

Pull the thread under the ch chain.

Pull one loop through the other to secure the thread.

The inner part of the square element for the children's blanket from the motif is ready. The gray thread is cut. The yellow thread is crocheted, and a chain of 3 ch is knitted under any one of the ch of the previous row.

Under the same 1 ch, 2 sc are knitted.

We knit 1 ch, and at the top we knit 3 s1n and 3 ch.

Under the same 3 ch of the previous row, another 3 dc are knitted. This will be the newly formed top of the square.

We knit 1 ch and 3 s1n under 1 ch of the previous row.

Next, the second peak, the third and the fourth are formed.


To move to the second row of yellow yarn, cast on 4 ch.

3 s1n are knitted into 1 ch of the previous row.

Finish the row with yellow yarn, forming all 4 vertices and connecting the row with a connecting half stitch.

The yellow thread is cut and secured. A green thread is pulled up and 2 rows are knitted.


By analogy with how the first motif was knitted, you need to knit 3 more of these. Total 4 square motifs.

Sew 2 finished motifs along the edge, folding them with their right sides facing inward. So you need to sew all 4 motifs.


When the motifs are sewn, we proceed to the binding. We connect the yellow thread under any of the chs of the previous row and knit according to the same principle as we crocheted small square motifs for a children's blanket.

Where the seam passes between the two motifs, 3 dc are knitted.

You can make the top of a children's blanket using crochet motifs following pattern 1 (the same as the top of the motifs).

We tie the stitched motifs with one row of yellow yarn.

We hook up the light pink yarn and knit the next row. You need 5 of these nearby.


A blue thread is knitted and 1 row is created.

Again 2 rows with light pink yarn.

And 2 more rows of light green yarn.

Repeat knitting with 2 more rows of pink and yellow yarn.


A row of sc is knitted around the perimeter of the blanket. At the tops, 8 sc are knitted under a chain of 3 ch.

To make wavy edges for a blanket, knit 2 rows of ch chains around the perimeter like this: place the hook under the sc of the previous row, pull a loop, knit 5 ch from it. Skip 1 sbn of the previous row and insert a hook into the next sbn, on which there is a chain of ch.
Pull the yarn through the sc of the previous row and the last loop on the hook. Repeat this around the entire perimeter of the blanket. Knit the second row of ch chains by placing the hook under the 5 ch chains of the previous row.


A children's crocheted blanket made from motifs is ready!
Video on knitting children's blankets from motifs:
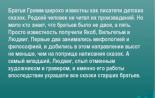
Studying the beautiful “Houndstooth” pattern


This crochet pattern looks very good on high-volume threads, such as acrylic, that is, fluffy ones. The pattern is reversible and is perfect for children's blankets.
For the blanket you will need: woolen or wool blend yarn of three colors (bright shades), hook number 4. Another option is acrylic yarn 230m per 100g, hook 4.5.

The pattern consists of four rows. In the first three rows the warp is knitted.
We start knitting the base like this: we knit a chain of ordinary air loops, determining the number of them desired for the length of the future product, a multiple of 4 + 2 lifting loops.
The pattern of the first row will be single crochets. The beginning of the second row will be three lifting loops. Then you need to knit three double crochet stitches. We repeat the entire row with a pattern of 1 chain stitch and 3 double crochets. We end the row with a group of 4 columns. We knit the third row according to the pattern of the second, paying attention that the groups of three columns do not move relative to each other. After the third row is knitted to the end, it is time to move on to a thread of a different color. Carefully secure the end of the thread in the knitting, passing it several times through the loops of the previous row.

In this master class we will tell you how to crochet a baby blanket with your own hands. This soft, pleasant blanket will wonderfully warm your baby during the cold season!
Tools and materials Time: 120 hours Difficulty: 7/10
- blue worsted cotton yarn – 9 skeins of 100 grams each;
- cream-colored worsted cotton yarn – 1 skein 140 grams;
- hook 5 mm;
- tapestry needle (to hide the ends of the yarn);
- scissors.
Crochet baby blankets are great for personal use or as a gift. Don't hesitate - this blanket will warm the heart of your loved one in the most severe cold! A detailed description with photos and diagrams will tell you how to weave it correctly.

The children's crocheted blanket is made of cotton worsted yarn with a thread of medium thickness. The matting crochet pattern gives it a cozy and homey look. If you need the warmest option for a snowy winter, replace cotton yarn with wool.

Detailed description with photo
Our size is designed for a baby blanket, but you can always increase it. Each square weave is repeated across 6 stitches, and to add width simply add an extra 6 stitches.
Final blanket size: approximately 107cm (width) x 84cm (length).
Sample Dimensions
Matting Pattern: (2 x 2 squares in weave = 6 stitches x 4 rows) = approx. 3.8 cm (W) x 3.5 cm (D).
Edging: (3 stitches x 6 rows) = approx. 3.8 cm (W) x 3.8 cm (D).

Abbreviations:
- v.p. - air loop;
- PSSN – half double crochet;
- Dc – double crochet;
- SSNpv (FPdc) – double crochet knitted at the top;
- SSNps (BPdc) – double crochet knitted from below;
- RLS – single crochet;
- connection art. – connecting post

Crochet baby blanket - diagram
Basic pattern
Beginning: (with blue yarn) ch 156, turn.
- Row 1: skip 3 ch, dc in 4th ch. from the hook, dc in each ch. to the end, 2 ch, turn (count the first skip of 3 ch as 1 dc, total 154 dc in this row).
- Rows 2 and 3: Skip first stitch, 1 hdc in next stitch, *3 dc, 3 dc* repeat 25 times to last 2 stitches. 2 hdc, 2 ch. (count as the first stitch on the next row), turn.
- Rows 4 and 5: Skip 1 stitch, 1 hdc in next stitch, *3 dc, 3 dc* repeat 25 times to last 2 stitches. 2 hdc, ch 2, turn.
Repeat rows 2-5 until you have worked 85 rows or reached a length of 76 cm. Finish with the 3rd or 5th row and do not work the last 2 ch.
Edging
Determine the front and back sides for your blanket. All stitches are performed only on the front part.
- Row 1: [with blue yarn]. 1 ch, 3 sc in the same corner. 1 sc in each stitch around the entire blanket, with 3 sc in each corner. Connection Art. in the initial ch, secure. Don't turn!
- Rows 2-6: [with cream colored yarn]. Ch 1, sc in the back stitches around the entire blanket. 3 sc in each corner. Connection Art. in the initial ch, do not turn. Fasten after the finishing 6th row.
Cut the ends of the threads and hide them in the weave.
Explanations for the diagram
This picture shows that after you make the first row of dc, you knit the second row of dc stitches and dc stitches.
Notice the horizontal lines created by the SSNps. Keep in mind that when you dc, the horizontal line will form the loops of the previous row of stitches. For SSNpv, vertical lines will be formed in the same way.
Using the stitches ssnpv and ssnps you will get a “Gottling” pattern.
Please note that when turning the crochet hook for the next row, the previous row will look like a DC stitch.

When you knit odd rows (rows 3, 5, 7, 9, etc.), the dc stitches will look like dc stitches, and vice versa. After completing the 3rd row you will have 2 horizontal lines that will form your pattern.
To start weaving the next row (i.e. rows 2, 4, 6, etc.), all you have to do is change what you see on the previous row, i.e. Crochet dc when you see dc, and vice versa.

After completing the 4th row with opposite loops ssnpv and ssnps, the effect of weaving will become obvious. In SSNps the stitches are horizontal and sunken, while in SSNpv the stitches are vertical and convex. This gives the effect of a wicker “matting”.

Continue matting for the entire blanket until you reach row 85 or a length of 76 cm (or until the last skein of thread in your arsenal).
- Single crochet in edging: 1st row of blue yarn and the next 5 rows of purl sc stitches made of cream yarn.
- Remember - 3 sc in each of the 4 corners.
Trim the yarn, braid and tuck the ends of the yarn into the stitches.

DIY crocheted baby blanket! We hope you like it and knit the same or similar one for yourself! We wish you good luck!